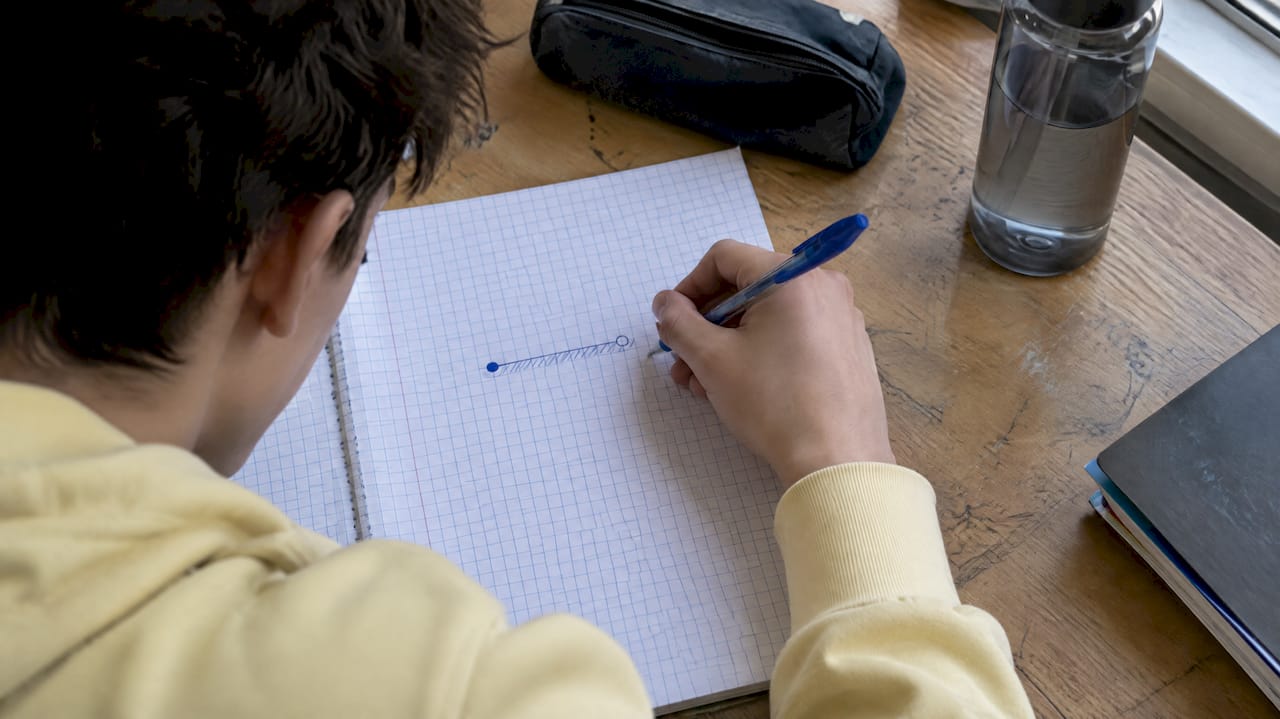
An error interval shows every possible value a rounded or truncated number could have been before rounding, written as LB ≤ x < UB. The rule is simple: add and subtract half the degree of accuracy from the rounded value. The lower bound is always included, the upper bound never is, because at that point the number would round up instead.
TL;DR:
- For truncation, use the recorded value as the lower bound and add the full degree of accuracy, rather than half, for the upper bound.
- For addition and multiplication, pair lower bounds for the minimum and upper bounds for the maximum; test combinations separately for subtraction and division.
- Leading zeros do not count as significant figures, while trailing zeros after a decimal point do, so they can change the place value used for bounds.
- Keep exact values through intermediate calculations and write each inequality clearly, since early rounding can shift the interval and clear working can earn method marks.
Table of Contents
- What bounds and error intervals actually mean
- How to find upper and lower bounds step by step
- Using bounds in calculations: addition, subtraction, multiplication and division
- Three worked examples you can copy into your revision
- Common exam mistakes and how to avoid them
- Quick timed practice: four questions in ten minutes
- Where this fits in your wider revision
- Absolute error versus relative error: what’s the difference
- How to calculate percentage error from bounds
- Showing error intervals on a number line
- Why error intervals matter outside the exam hall
- What affects the size of an error bound
- Why we think bounds deserve more exam-day attention than they get
- Practise more bounds questions with full worked solutions
- FAQ
- Sources
What bounds and error intervals actually mean
A bound describes the edge of what a rounded number could have been. The lower bound (LB) is the smallest value that would round to the figure you’re given, and the upper bound (UB) is the smallest value that would round up past it. Together they form the error interval, written as LB ≤ x < UB.
This notation matters because it tells the full story in one line: every value from the lower bound up to, but not including, the upper bound would round to the same answer. According to OCR’s GCSE Mathematics specification, the lower bound is inclusive and the upper bound is exclusive, and bounds are found by adding or subtracting half the degree of accuracy.
A few quick examples make the pattern clear:
- A number rounded to the nearest whole number, such as 7, has bounds 6.5 ≤ x < 7.5.
- A number rounded to the nearest 10, such as 80, has bounds 75 ≤ x < 85.
- A number given to 1 decimal place, such as 4.6, has bounds 4.55 ≤ x < 4.65.
- A number given to 2 decimal places, such as 3.27, has bounds 3.265 ≤ x < 3.275.
For significant figures, count digits from the first non-zero digit, so 0.0450 to 3 s.f. treats the trailing zero as significant and the leading zeros as placeholders only.
How to find upper and lower bounds step by step
Whether you’re dealing with rounding or truncation, the method stays consistent. Work through it in this order and you’ll rarely lose a mark on a bounds question.
- Identify the degree of accuracy stated or implied in the question, such as 1 dp, nearest 10, or 3 significant figures.
- Halve that degree of accuracy. For 1 dp, half the degree is 0.05; for the nearest 10, it’s 5; for 3 s.f., it depends on the place value of the third significant digit.
- Add the half value to the rounded number for the upper bound, and subtract it for the lower bound.
- For truncation, the rule changes. A truncated number has already had digits chopped off rather than rounded, so the lower bound equals the truncated value itself, and the upper bound is the truncated value plus the full degree of accuracy (not half).
- Watch significant figures with zeros carefully. Leading zeros never count, trailing zeros after a decimal point do, and this affects where the half-degree calculation applies.
Pro Tip: Keep every bound as an exact fraction or decimal until the very last line of your working; rounding too early is one of the most common ways marks are lost on these questions.
Using bounds in calculations: addition, subtraction, multiplication and division
Once you have bounds for individual measurements, exam questions often ask you to combine them, and the rules differ depending on the operation.
- For addition, add the two lower bounds to get the new lower bound, and add the two upper bounds to get the new upper bound.
- For subtraction, the maximum and minimum results come from testing combinations of bounds; always verify which produces the correct extremum.
- For multiplication, multiply the two lower bounds for the smallest possible result and the two upper bounds for the largest.
- For division, identify the largest and smallest results by testing combinations, rather than assuming largest over smallest.
Subtraction and division need extra care because the “biggest minus biggest” instinct gives the wrong answer; always test which combination of extremes actually produces the maximum and minimum. AQA’s subject content stresses estimating with limits of accuracy and warns against rounding during these intermediate steps, since early rounding can shift your final interval outside the true range.
To secure method marks, write out each bound clearly at every stage rather than just the final answer; our guide on showing working in GCSE maths covers exactly how examiners want this presented. A midpoint estimate (using the rounded value itself rather than the bounds) is fine for a quick sanity check of your answer, but never for the final submitted inequality.
Three worked examples you can copy into your revision
These model answers follow the structure examiners reward: identify the accuracy, apply the rule, state the inequality.
- Rounded number to 1 decimal place. A length is given as 8.3 cm, rounded to 1 dp. Half of 0.1 is 0.05, so the lower bound is 8.3 − 0.05 = 8.25, and the upper bound is 8.3 + 0.05 = 8.35. Final answer: 8.25 ≤ x < 8.35.
- Truncated measurement. A reading of 14.7 seconds has been truncated to 1 dp, meaning digits beyond that point were simply dropped, not rounded. The lower bound is the truncated value itself, 14.7, and the upper bound is 14.7 + 0.1 = 14.8. Final answer: 14.7 ≤ x < 14.8.
- Composite calculation (area). A rectangle has sides measured as 5.2 cm and 3.4 cm, both to 1 dp. Side one gives bounds 5.15 ≤ x < 5.25, and side two gives bounds 3.35 ≤ x < 3.45. For the maximum area, multiply the two upper bounds: 5.25 × 3.45 = 18.1125 cm². For the minimum, multiply the two lower bounds: 5.15 × 3.35 = 17.2525 cm². Final answer: 17.2525 ≤ area < 18.1125.
Each step above earns credit independently. OCR’s November 2023 examiners’ report notes that candidates who show the inequality clearly, even with an arithmetic slip later on, can still pick up method marks rather than losing everything.
Common exam mistakes and how to avoid them
Most dropped marks on bounds questions come from a handful of repeated errors rather than a lack of understanding.
- Rounding intermediate values before the final step changes the true bounds and often shifts the final interval outside the acceptable range.
- Writing “≤” on both sides instead of leaving the upper bound exclusive, which contradicts the standard convention.
- Forgetting to halve the degree of accuracy and simply adding or subtracting the whole unit instead.
- Treating truncation like rounding, which produces an incorrect lower bound.
OCR’s examiners’ report specifically flags early rounding as a recurring issue, and recommends that students write the inequality even when unsure of the final numeric answer, since this alone can secure partial credit. Our breakdown of method marks explains how examiners allocate these marks in more depth.
Pro Tip: Label every bound as you calculate it (LB = …, UB = …) rather than leaving numbers unexplained; a labelled line is far easier for an examiner to credit than a bare calculation.
Quick timed practice: four questions in ten minutes
Set a timer for 8 to 10 minutes and attempt these before checking the answers.
- A mass is recorded as 12 kg to the nearest whole number. State the error interval.
- A length of 9.6 m has been truncated to 1 dp. State the error interval.
- Two lengths, 6.4 cm and 2.1 cm, are each given to 1 dp. Find the maximum possible perimeter of a rectangle with these sides.
Mark your own answers against these, and if you got a bound wrong, check whether the mistake was in identifying the degree of accuracy or in the half-value calculation; that distinction tells you exactly what to revise next.
Where this fits in your wider revision
The site is built around full worked solutions and video walkthroughs mapped to UK exam boards, including the bounds and error interval questions that appear across GCSE and IGCSE papers in England, Wales and Scotland. Students working through past papers can check their method line by line against ours, which helps confirm whether a wrong answer came from the bounds rule itself or from a later arithmetic step.
Absolute error versus relative error: what’s the difference
Absolute error is the straightforward difference between a measured or rounded value and the true value, expressed in the same units as the measurement itself. If a length is measured as 8.3 cm and the true length is 8.28 cm, the absolute error is 0.02 cm. It tells you the size of the gap, but nothing about whether that gap is significant.
Relative error puts that gap into context by comparing it to the size of the measurement itself. It’s calculated as absolute error divided by the true (or given) value, and it’s usually expressed as a decimal or a percentage. A 0.02 cm error on an 8.3 cm length is far less significant than the same 0.02 cm error on a 0.5 cm length, and relative error is what makes that difference visible.
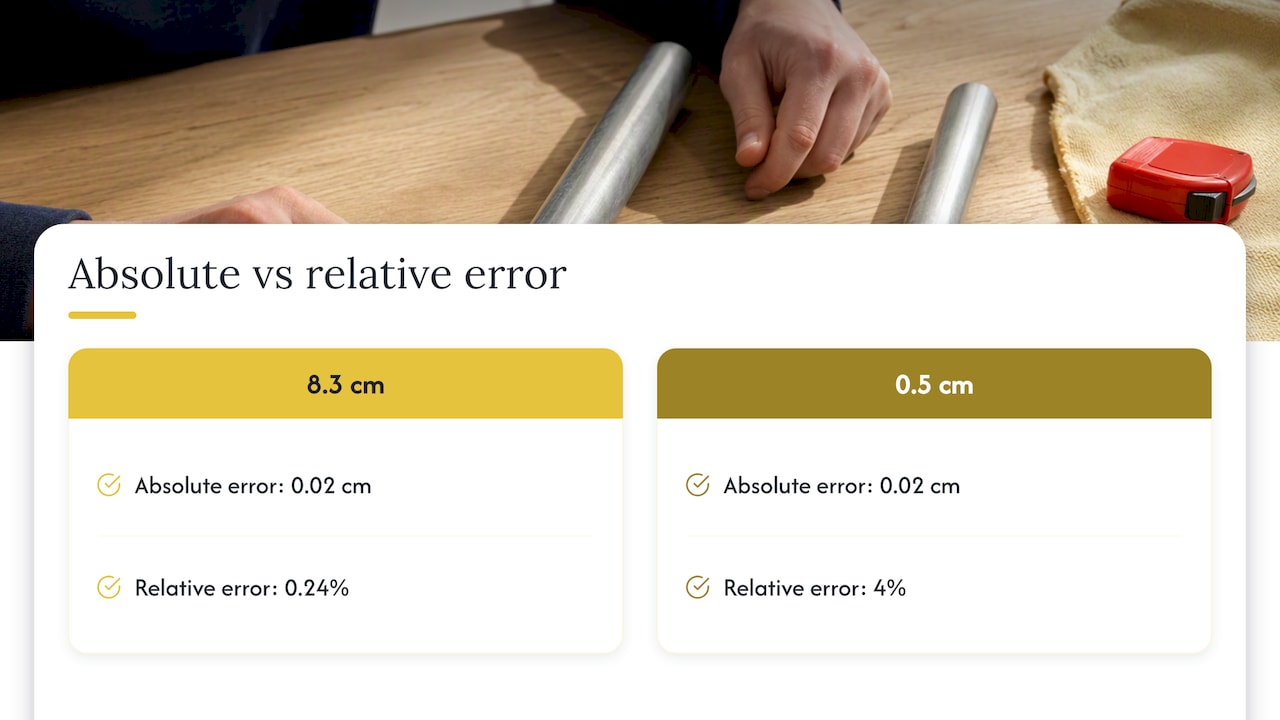
This distinction matters in exam questions that ask you to judge how “good” a measurement is, rather than just state its bounds. Two measurements can have identical absolute errors but very different relative errors, and a question might ask you to compare the accuracy of two instruments or two recorded values on exactly this basis. Knowing which type of error a question is asking for, and showing the correct formula, is often worth a mark on its own, separate from the bounds calculation itself.
How to calculate percentage error from bounds
Percentage error is simply relative error expressed as a percentage, and it connects directly back to the bounds you’ve already calculated. Once you know the upper and lower bounds of a measurement, you can find the maximum possible error by taking the larger gap between the rounded value and either bound, then dividing by the rounded (or true) value and multiplying by 100.
For example, if a length is given as 6.4 cm to 1 dp, the bounds are 6.35 ≤ x < 6.45. The maximum possible absolute error is 0.05 cm (the gap to either bound).
This method works the same way regardless of whether you’re dealing with a single measurement or a value calculated from several bounded quantities; you simply use the maximum absolute error from your final combined interval rather than from a single reading. Showing this division step clearly, rather than jumping straight to a percentage, is what earns the method mark even if your final percentage has a small rounding slip.
Showing error intervals on a number line
Drawing an error interval on a number line makes the inclusive and exclusive ends immediately visible, which is useful both for checking your own working and for explaining an answer in an exam.
The convention is a filled (solid) circle at the lower bound, because that value is included, and an open (hollow) circle at the upper bound, because that value is excluded. A line or shaded segment connects the two, showing every value in between as part of the interval. For the earlier example of 8.3 cm rounded to 1 dp, you’d draw a solid dot at 8.25, an open dot at 8.35, and shade the gap between them.
This visual check is particularly useful when combining two bounds through a calculation, since it’s easy to see at a glance whether your final interval makes sense relative to the two starting intervals. If a combined interval ends up narrower than either original bound, for instance, that’s usually a sign of an error in the working, because combining measurements should generally widen uncertainty, not shrink it. Sketching the number line takes seconds and can catch exactly this kind of mistake before you commit to a final answer.
Why error intervals matter outside the exam hall
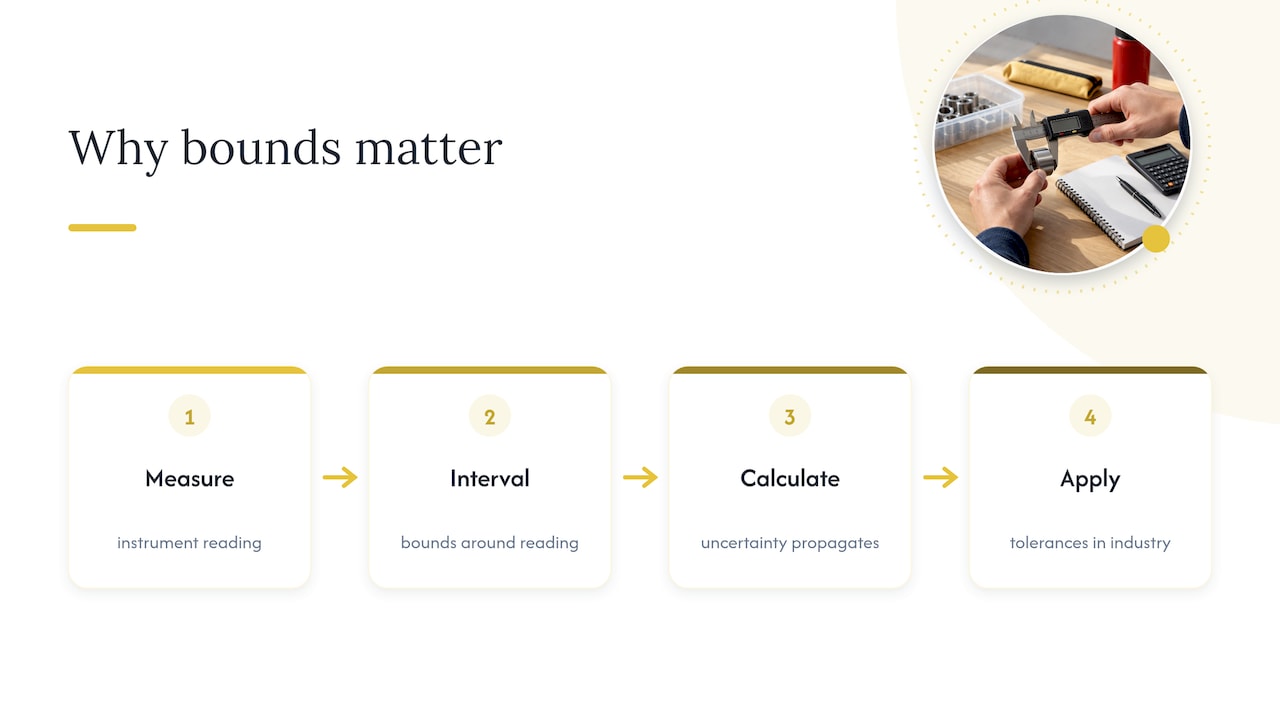
Bounds and error intervals aren’t just an abstract exam topic; they describe something that happens every time a measurement is taken in science, engineering or everyday life. Any instrument, whether a ruler, a set of kitchen scales or a stopwatch, has a limit to how precisely it can record a value, and that limit is exactly what an error interval captures.
In a school science experiment, a measured mass of 25 g on a scale that rounds to the nearest gram carries the same bounds logic as a GCSE maths question: the true mass could be anywhere from 24.5 g up to (but not including) 25.5 g. When that mass is then used in a further calculation, such as working out a density or a rate of reaction, the uncertainty propagates through exactly as it does in the multiplication and division rules covered earlier.
This is also why professions that rely on precise measurement, from construction to pharmaceutical dosing, build in tolerances rather than assuming a single exact figure is ever achievable. Understanding how bounds propagate through calculations is the mathematical skill behind that practice, and it’s the same skill being tested in a GCSE or IGCSE exam question, just applied to a real instrument rather than a number on a page.
What affects the size of an error bound
The size of an error interval is set entirely by the degree of accuracy the original value was rounded or truncated to, so a coarser rounding always produces a wider interval and a finer one always produces a narrower one. A length given to the nearest whole centimetre carries a much wider error interval than the same length given to 2 decimal places, even though both describe the same physical object.
In practical measurement, this connects directly to the precision of the instrument used. A ruler marked only in centimetres cannot honestly report a reading more precise than the nearest half centimetre, while digital callipers might support readings to a hundredth of a millimetre. The error interval you state should always match the actual precision of the tool or the rounding instruction given in the question, never an arbitrary choice.
This is also why exam questions are specific about degree of accuracy: stating “3 significant figures” rather than “a rounded number” removes any ambiguity about how wide the interval should be. Pearson’s guidance on significant figures notes that leading zeros are placeholders while trailing zeros after a decimal point are significant, and getting this distinction right is often the difference between a correct and an incorrect bound when the stated accuracy involves zeros.
Why we think bounds deserve more exam-day attention than they get
Most revision guides treat error intervals as a quick notation topic, something to memorise for a single mark rather than a method worth drilling properly. That undersells it. Bounds questions reappear inside bigger calculation problems throughout a GCSE paper, so a shaky grasp of the half-degree rule doesn’t just cost one mark, it quietly costs marks in area, volume, speed and compound measure questions further down the paper.
The conventional advice to “just remember plus or minus half” also skips the part that actually trips students up: knowing when a question means truncation instead of rounding, and handling zeros correctly in significant figures. Those two traps account for a disproportionate share of lost marks relative to how simple the underlying rule is.
If you take one thing from this topic, prioritise the truncation versus rounding distinction and practise writing the inequality notation automatically, even under time pressure. Everything else, including propagation through calculations, becomes far easier once that foundation is solid.
— Oloru
Practise more bounds questions with full worked solutions
We keep worked solutions, video walkthroughs and revision guides organised by exam board, so you can go straight from this topic to practising it on real past-paper questions.

- Browse our GCSE maths revision guides for topic-by-topic breakdowns, including bounds and error intervals.
- Work through WJEC 2023 worked solutions to see full step-by-step reasoning on calculation questions involving bounds.
- Watch the WJEC 2018 video solution walkthroughs if you prefer seeing the method explained aloud.
Join one of our live Q&A sessions or download a revision pack if you want extra support working through trickier bounds and error interval questions.
FAQ
What is the rule for finding an error interval?
Add half the degree of accuracy to the rounded value for the upper bound, and subtract half for the lower bound, written as LB ≤ x < UB. The lower bound is included and the upper bound is excluded, because a value exactly at the upper bound would round up instead.
How are bounds different for a truncated number compared with a rounded one?
For a truncated number, the lower bound equals the truncated value itself, since nothing was rounded down to reach it. The upper bound equals the truncated value plus the full degree of accuracy, not half, which is the key difference from standard rounding.
Why is the upper bound written with a strict inequality sign?
The upper bound is excluded because a value exactly equal to it would round up to the next figure rather than staying within the stated interval. This is why the notation always reads LB ≤ x < UB rather than using ≤ on both sides.
Can I use bounds across multiple calculation steps without losing marks?
Yes, as long as you keep exact bound values at each step rather than rounding in between. AQA’s subject content guidance specifically warns against rounding intermediate steps, since this can shift your final interval away from the correct range.
What is the difference between absolute error and percentage error?
Absolute error is the raw size of the gap between a measured value and the true value, given in the same units as the measurement. Percentage error expresses that same gap relative to the size of the value itself, which makes it more useful for comparing the accuracy of different measurements.
Sources
- Cambridge OCR GCSE (9–1) in Mathematics (J560) specification (bounds content)
- AQA GCSE Mathematics subject content (rounding and bounds)
- Pearson guidance: significant figures and rounding
Leave a Reply